How to set up Recurring Payments (Subscriptions) with Paypal
Premium Plus Paypal Members have the ability to add Paypal Payments to your online forms. They also have the ability to set up recurring payments via any Paypal account. This tutorial will explain how to set up a quick monthly recurring payment form. Please note that users who sign up for recurring payments must have (or sign up for) a Paypal account to take advantage of this feature.
IMPORTANT: This tutorial assumes that you have already completed the initial Paypal setup with your site. If you need assistance setting up your Paypal settings, please visit THIS TUTORIAL. Additionally, this tutorial assumes you know the basic usage of our form system. If you need instruction on using the forms, please visit THIS TUTORIAL.
Step 1: Select a Form or Create a New One
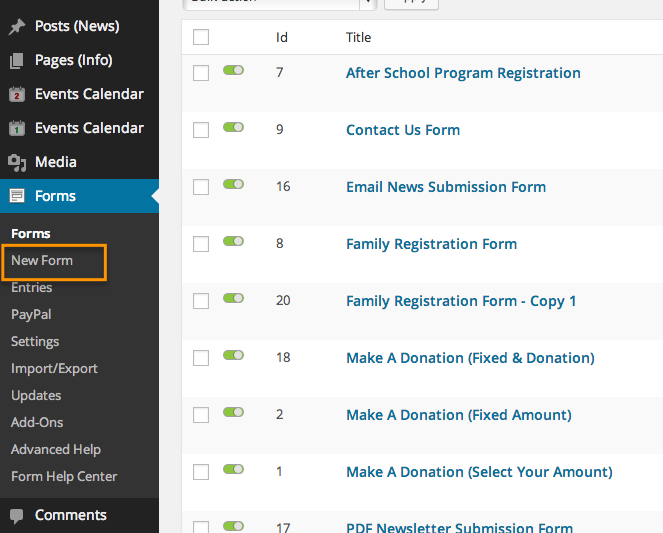
The first thing we need to do is set up a new form, or pick a form to use for our recurring donations. In this example, we are going to set up a new form.
Step 2: Name your form and add Description
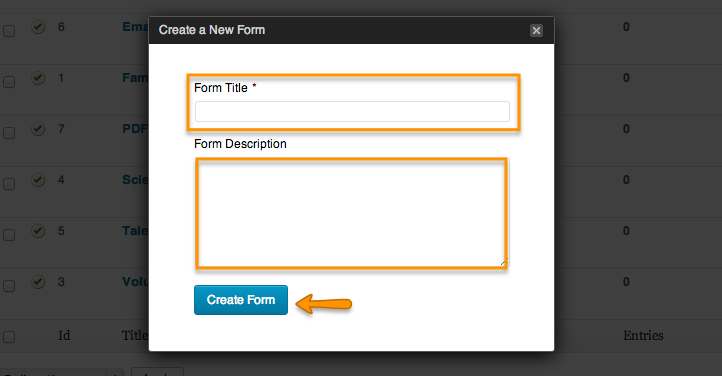
When the initial set up box appears, enter a name for your form and an optional description. When you are finished, click CREATE FORM
Step 3: Add the Required User Fields

When you create a new form you will be prompted to add some new fields to your form. It is important that you add the necessary fields required by Paypal about your users to your form. You can add as many fields as you want, but you must add at least the basics. Click on the ADVANCED FIELDS section and click on NAME, ADDRESS and EMAIL fields. These fields will be added to your form in the order you click them.
Step 4: Add a Product Field
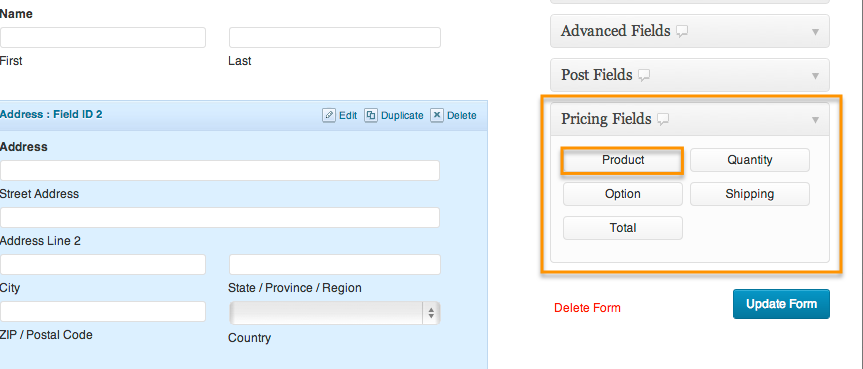
Now we need to add our recurring payment product. Click on the PRICING FIELDS tab on the right and then click on PRODUCT. This will add a basic product field to the end of your form.
Step 5: Define the Field Label (Title)
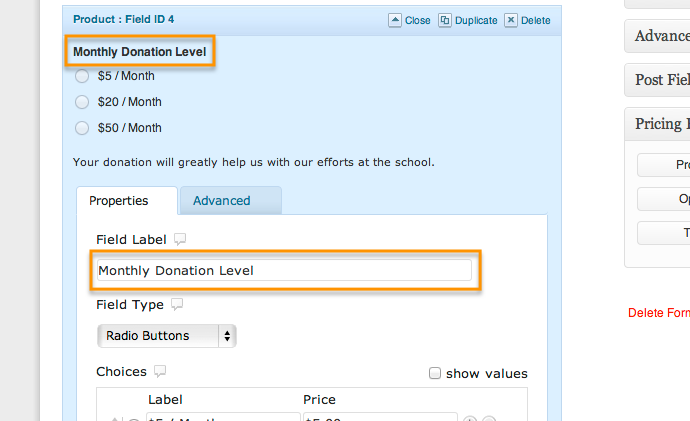
Enter the Title of your selections in the Field Label Field.
Step 6: Select a Field Type

There are a variety of ways to present your recurring donations, but we prefer using Radio Buttons. In the field type drop down select RADIO BUTTONS. You may select whatever fits your needs here. We will use Radio Buttons in our example.
Step 7: Define your Choices
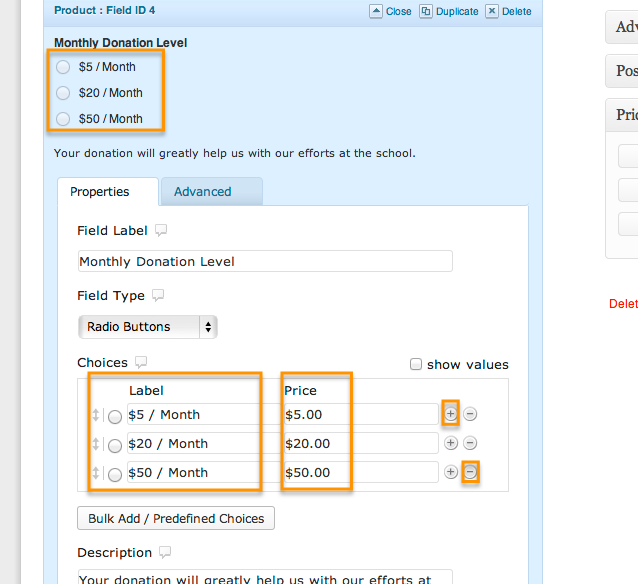
When you make a selection for your Field Type, your form will briefly close and re-open with your new options. By default you have three choices available, but you can add or remove rows by clicking the PLUS and MINUS signs to the right side. Enter the text you want the user to see under the Label Column and then the actual Price in the Price column to the right of the Label.
Step 8: Enter a Description (Optional)

If you want to, enter a Description of your “product” in the description field. This is a great place to explain why it’s important to donate, or how their donation will help your group.
Step 9: Update or Save your Form

When you have finished adding any additional fields you want, be sure to UPDATE or SAVE your form to save your changes.
Step 10: Create a new Paypal Connection
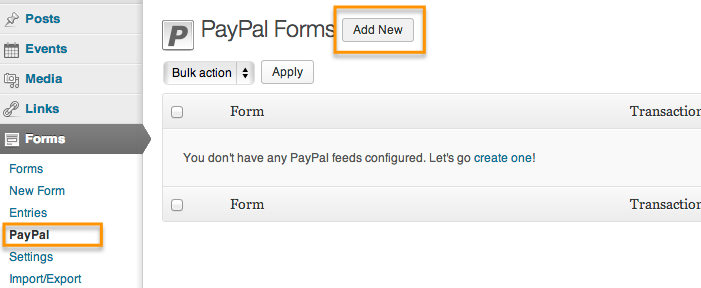
Once you have saved your form, click on the PAYPAL link and then click ADD NEW to create a new form connection with Paypal.
Step 11: Enter Your Paypal Email Address
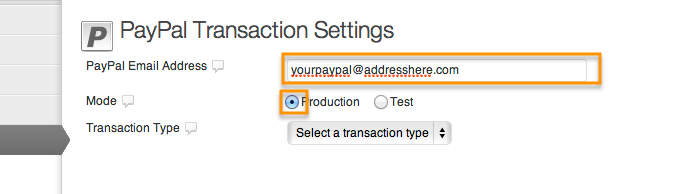
Enter your Paypal Email Address in the correct field. This is the email address you use to log into Paypal. Keep MODE set to Production.
Step 12: Select a Transaction Type
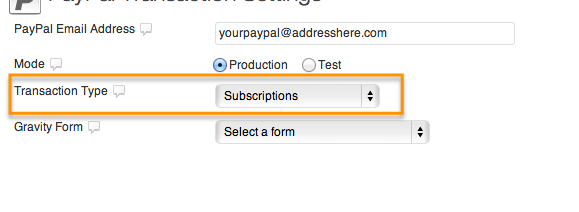
Under the Transaction Type Drop Down, select SUBSCRIPTIONS. This will allow you to set up a recurring payment for your subscribers.
Step 13: Select the Recurring Payment Form

In the Gravity Form Field, select the form that you wish to use for your recurring payments.
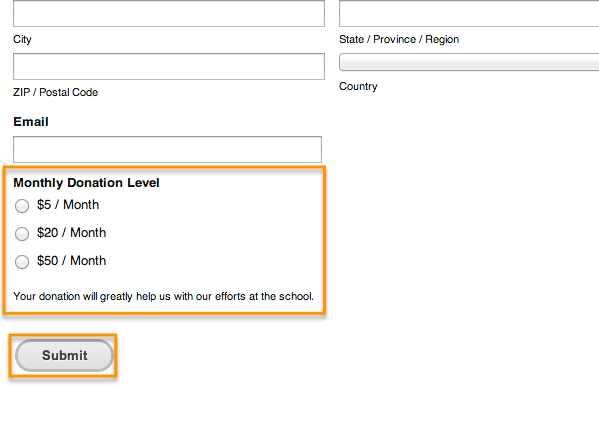
Step 14: Select the Recurring Amount Field
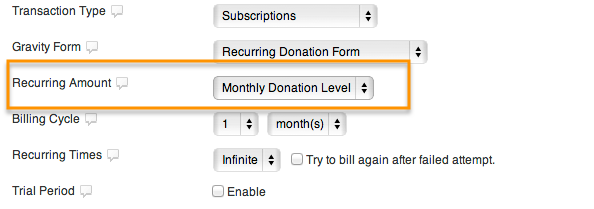
In the Recurring Amount field, select the field that the user selects their subscription level in. In our case, it was the Monthly Donation level field.
Step 15: Select your Billing Cycle
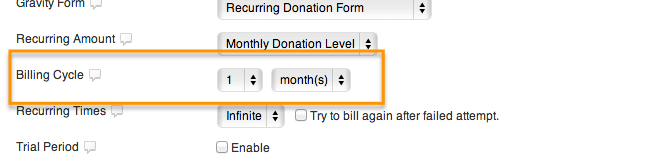
In the billing cycle field, select the frequency that you will be charging the user. In our example, it is a monthly fee, so we’re selecting every one month.
Step 16: Specify Recurring Times

Next you need to determine how many times you are going to be charging this recurring fee. It can be Infinite or you can select how many months the donation will recur. In our example, we are going to make it for one full year, so we will be selecting 12 times. We would also suggest that you check the “Try to Bill Again after failed attempt” option just in case a transaction is declined along the way.
Step 17: Match Form Fields to Paypal Fields
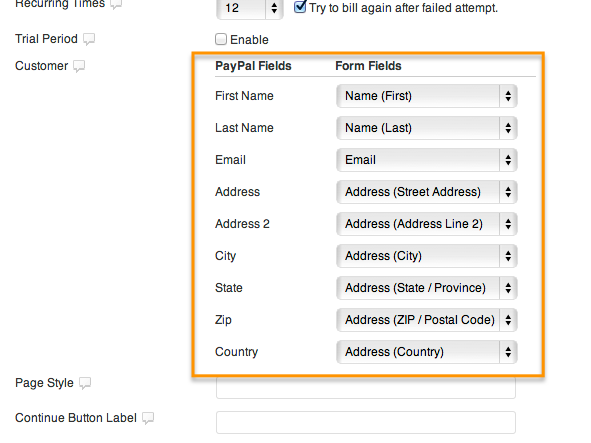
Next you will want to match up the fields on your form to the fields that Paypal collects. This will make it easier for your subscribers to check out as the information they have already provided to you will be pre-populated in their Paypal checkout.
Step 18: Specify your Options
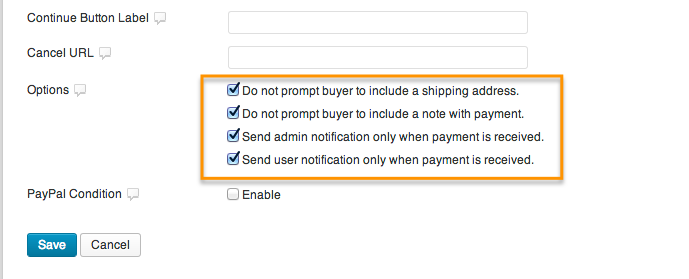
There are a variety of options you can set at the end of your form. We don’t need to collect a shipping address, we don’t need the buyer to include a note of any kind and we only want emails to be sent out when an actual payment is received, so we are going to check all 4 boxes in the options. This is the most common setting.
Step 19: Save your Settings
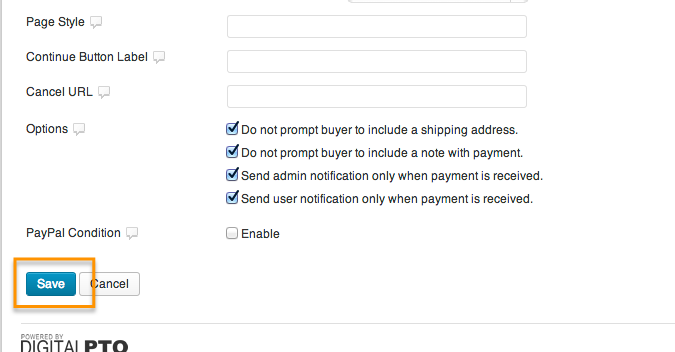
When you are finished with your settings, click the SAVE or UPDATE button to record your changes.
Step 20: Test out your Form
Once you have saved everything, add the form to your website (need help adding your form?) and test it out. Fill out your form and click SUBMIT. This should take you to a paypal checkout page with your new subscription options. Congrats! You finished creating a subscription page.
