Adding a Google Calendar to your Digital PTO Website
Some of our members already have existing calendars that are created by Google Calendar. There is a way you can add a Google Calendar to your Digital PTO website and display it along side your PTA / PTO information. This is a decent method to display dates, but there are a few things to keep in mind before you add a Google Calendar to your site.
- Google Calendar does not work with the widgets we provide, so you will not be able to easily display upcoming events on the sidebar of your site
- You will have to edit your calendar in google, which is fine, but it is one more log in to remember and if you are working with a group of people, you may need to provide your google log in information to many people.
- If you are a Premium Plus Member, the Premium Plus Calendar can IMPORT and SYNC Google Calendar feeds so that you can still use all the great technology available to you through our widgets and management system and provide your google calendar feeds. Please see our Tutorial on adding a feed to your Premium Plus Calendar for more information.
Step 1: Select the Google Calendar
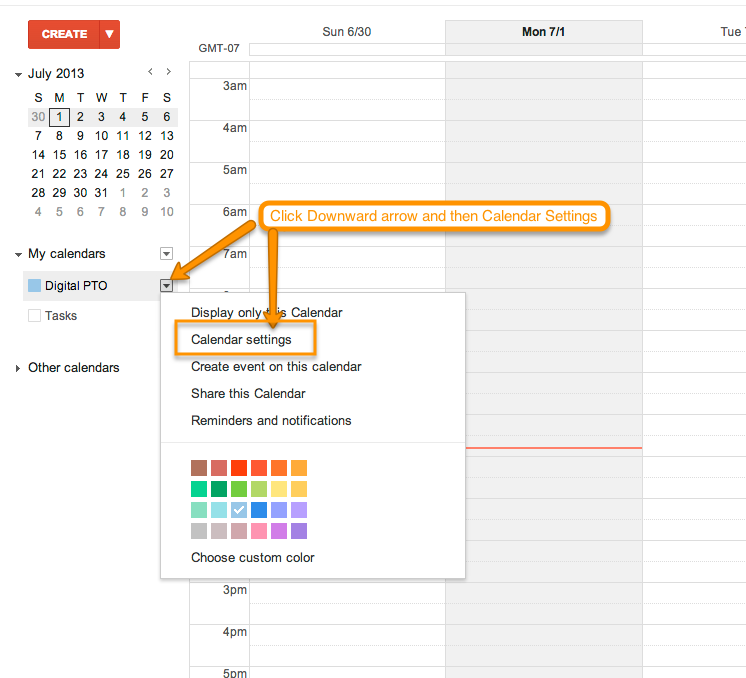
When you are logged into your Google Calendar, click the little downward arrow next to your calendar to open up the options. Select CALENDAR SETTINGS to proceed to the code you need.
Step 2: Copy the Embed Code from the Settings Page
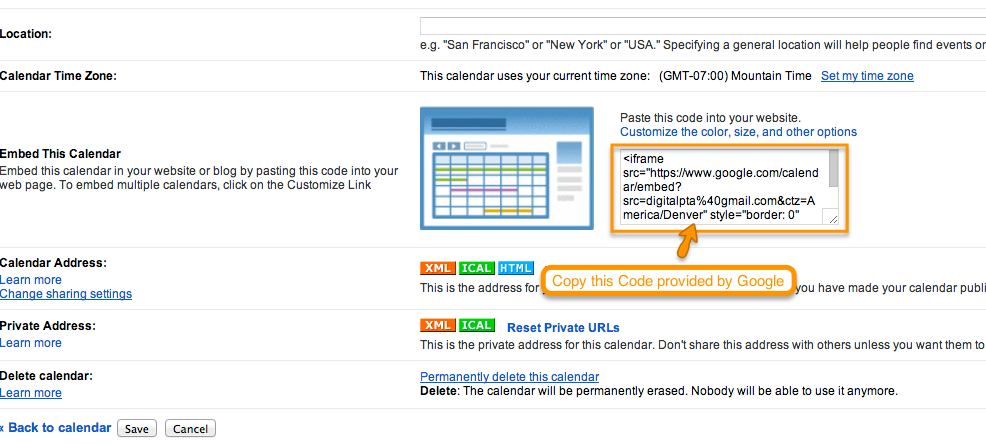
When the Calendar Settings page opens, select the entire code provided and COPY it.
Step 3: Create a New Page or Open a Page on your Website
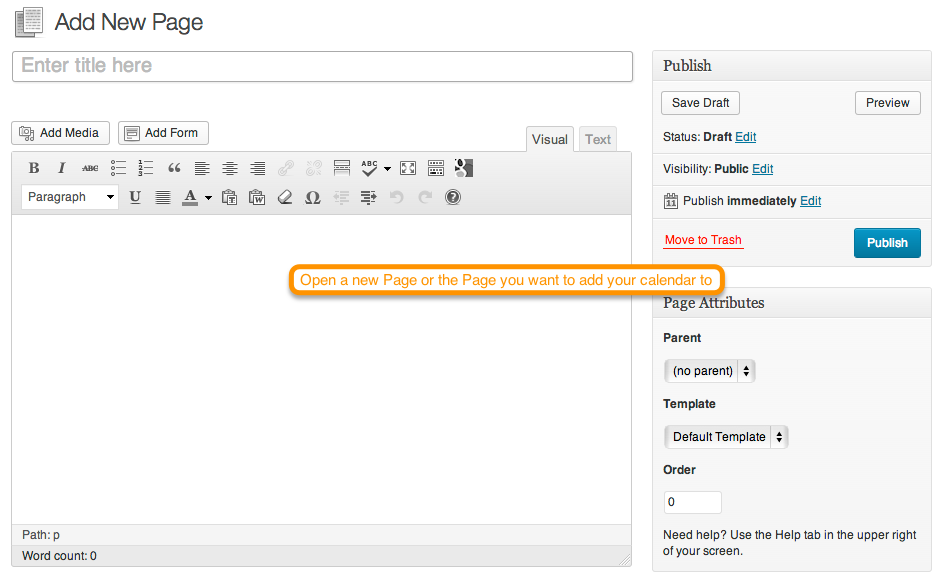
Next, head to your Digital PTO website and either create a new page, or open the page you wish to add the calendar to in your Admin Editor.
Step 4: Switch to the HTML/TEXT Tab and Paste your Code
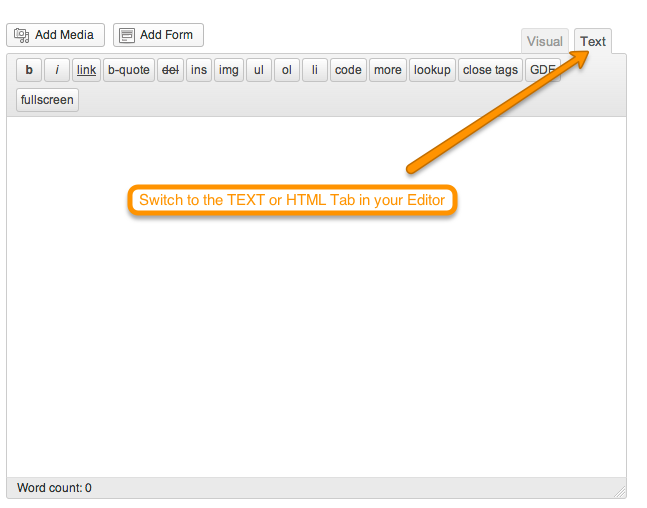
In your editor, you need to switch to the HTML or TEXT Tab (Depends on which version of the software you have) – you do not want the VISUAL tab. Once you have switched to the other tab, you can paste in the code you copied from Google and PUBLISH/UPDATE your site.
Step 5: Preview Your Calendar

Once you have Published your calendar, be sure to view it in the LIVE side of your website to make sure it looks good. If you are using a theme that offers a “Wide” page option, we suggest using a wide template as it will look a little nicer.
Step 6: Making Changes or Adding Additional Calendars
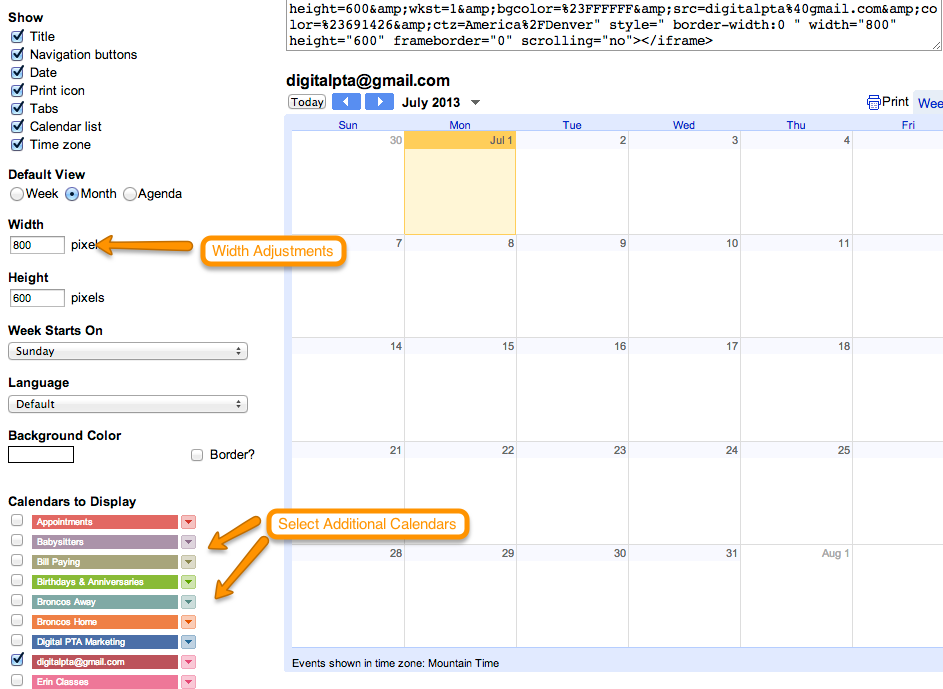
If you need to make adjustments to your calendar (size, colors, etc) you can click on the link above the code that says “Customize the color, size and other options”. This will open additional options. Here you can select the width of your calendar, some default settings and also add additional calendars in your account to your embedded calendar. Be sure to copy the NEW code that Google Creates and paste it back into your calendar page. Then you should be all set! Experiment and plan around.
