How to Clean Up & Organize Crowded Navigation Menus
As PTAs and PTOs start to add more and more content to their websites, many will start to notice that their top navigation menu might not look very good because there are too many links on it and it is now moving to a second line. This is especially common after switching themes. The image below is a great example of the kind of cluttered navigation that is common to new PTA and PTO websites.
 This tutorial will show you how to assign the correct menu to your theme as well as how to modify and adjust your menu. The majority of our themes also support Drop Down Menu’s, so we will also show you how to make sub-menu’s to help consolidate. Please note that this tutorial is based on our Starter Theme, but applies to any Digital PTO theme that has the option to assign a menu to the navigation. We do offer a small group of themes that do not support menus. If this applies to you, we would suggest selecting a different theme, or making fewer main pages.
Step 1: Access the Menus Section
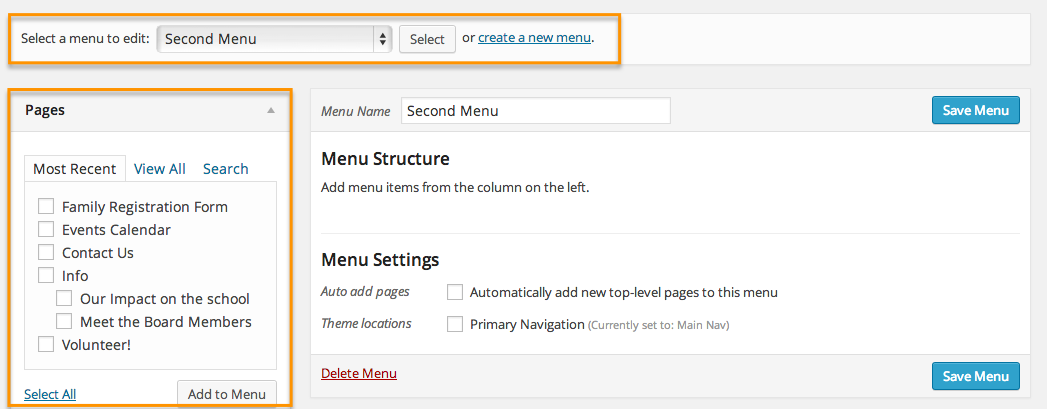
Step 2: Understanding the Menu Manager Screen
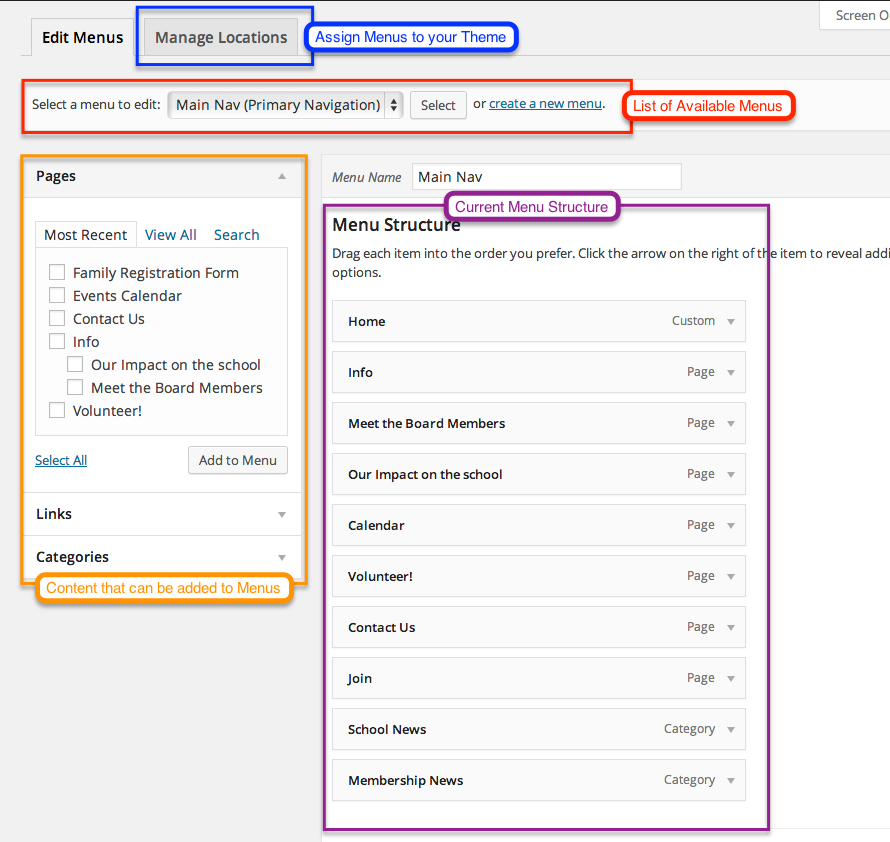
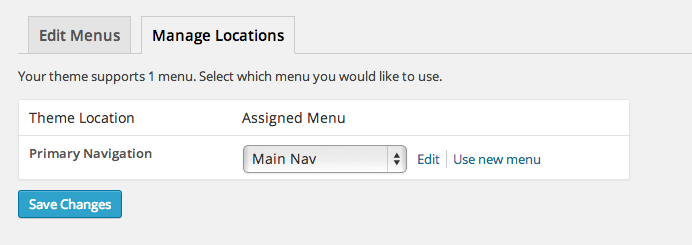
Manage Locations: This Tab is where you will assign different menus to your theme. If your theme supports more than one menu (for example a Main Menu and a Sub Menu) all options will be listed in this section.
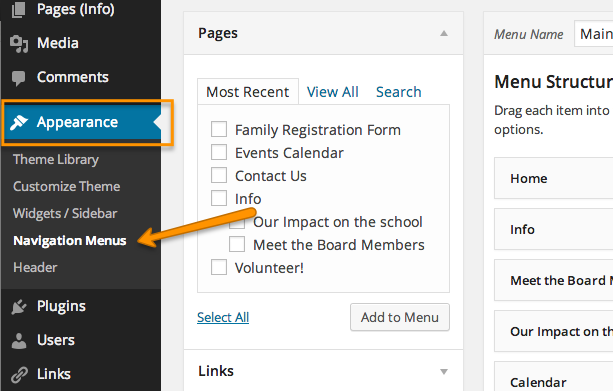
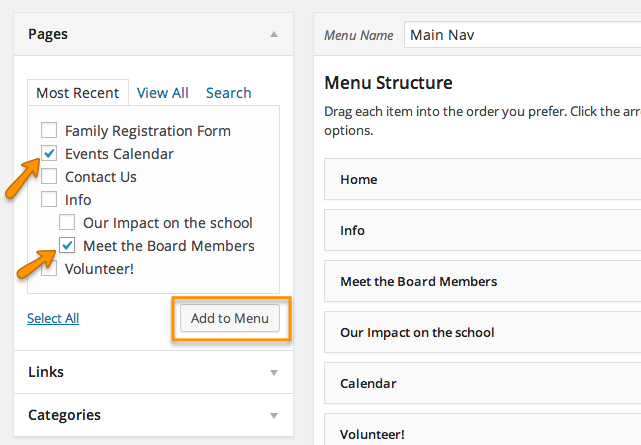
Pages: This is a list of all of your available pages that can be added to your menus. Most Recent lists the most recently added pages, View All lists all pages on your site (may have multiple pages) and the Search function allows you to search for a specific page on your site to add.
Links: This page allows you to add a link to an external website that is not a part of your Pages or Categories.
Categories: This is a list of the categories that you have for your News Posts. You can link to a specific category in your navigation as well as to pages. For example, you might want to link to “Fundraising News” and have a list of all the News Posts you’ve published about your fundraising efforts.
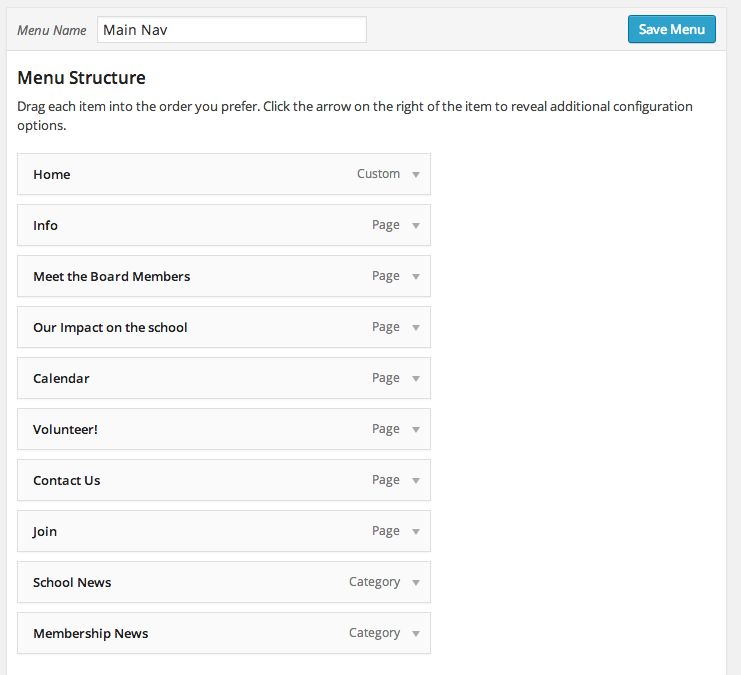
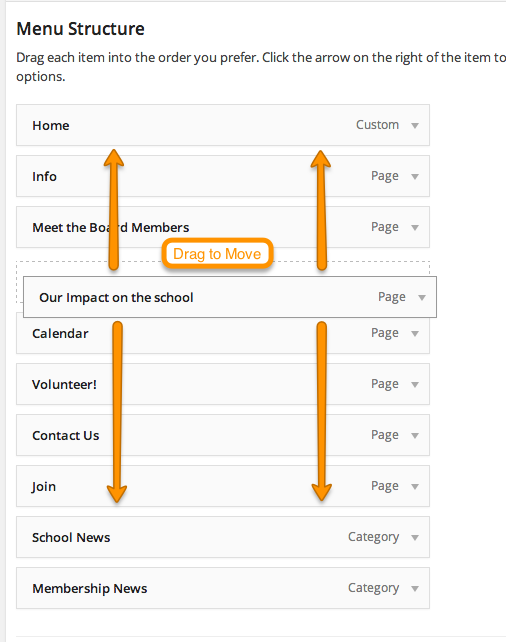
Current Menu Structure: This section contains your menu (or menu’s if you have more than one) and is where you can add, arrange and edit all of your menu items.
Step 3: Assign a Menu to your Theme
Step 4: Review your Current Navigation
Adding Pages to your Menu
Categories can be added the exact same way in the Categories Module.
Moving Menu Items Around
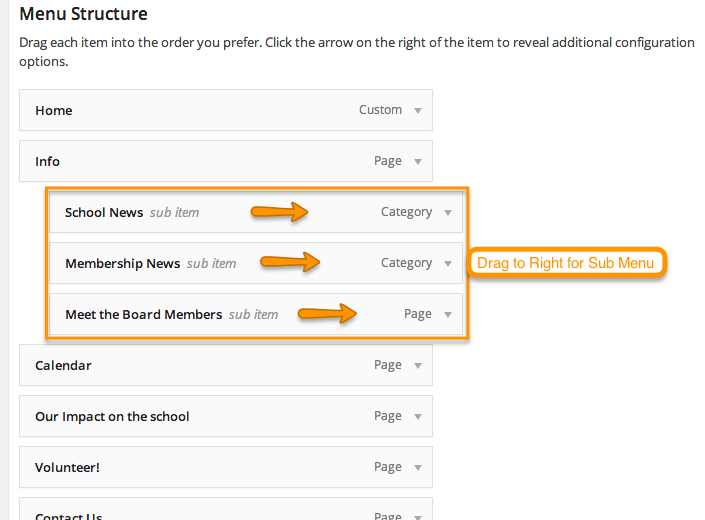
Creating a Sub Menu (Drop Down Menu)
Editing & Shortening Page Menu Names
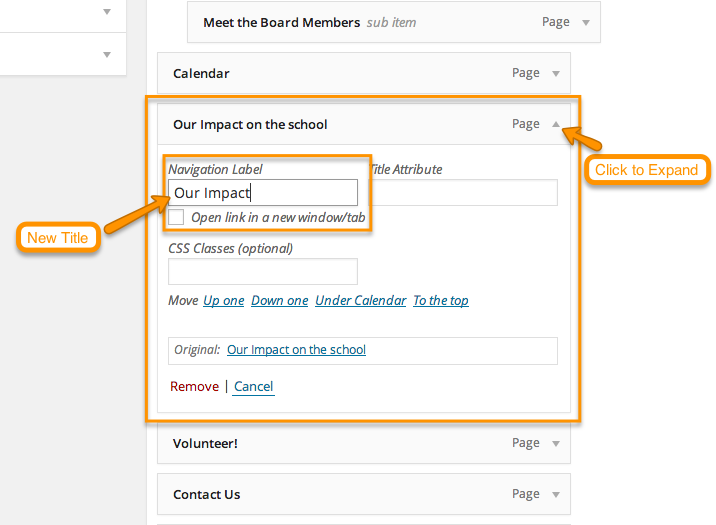
Try to keep your Menu Item Names short! Your site is much easier to navigate this way.
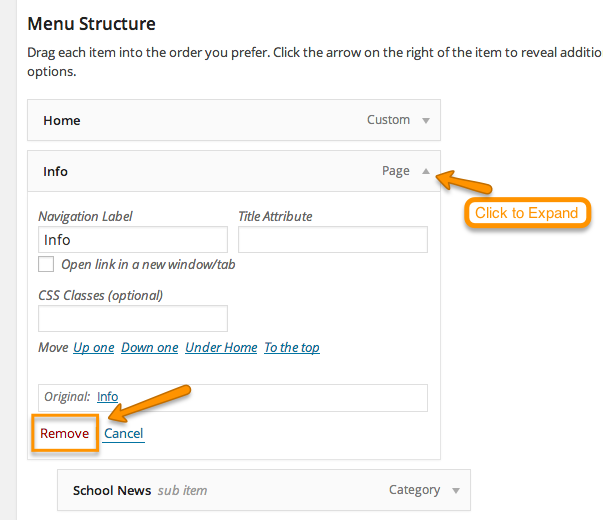
Removing a Menu Item
Cleaning up your Menu to One Row
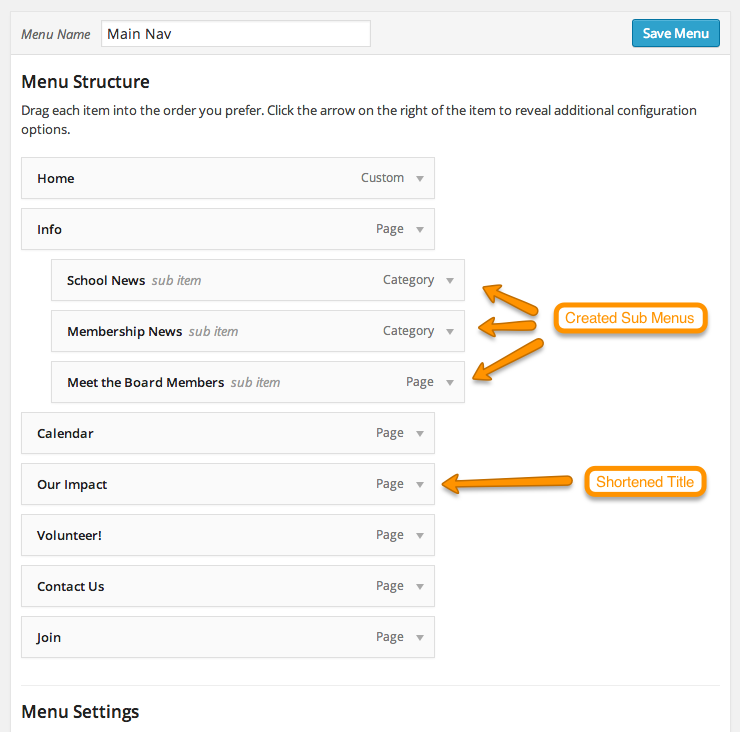
 [alertThe example above demonstrates what a one row menu should look like. It is well organized and has a variety of sub menus. Your main navigation should have between 7 and 10 items at most (depending on length of the menu titles) and if you have more pages, try to add them as sub (drop down) menus. [/alert]
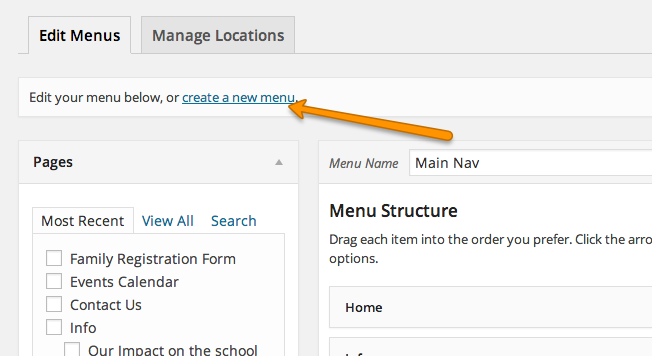
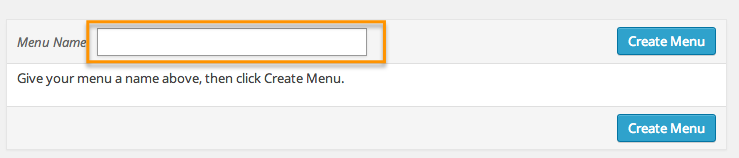
To Create a New Menu
Be sure to SAVE your Menu Changes!

