How to Assign your own Custom Domain Name
Digital PTO offers the ability to use your own domain name when you are a member of a Basic or higher Plan. This allows your website to be accessed not only from your original address (schoolname.digitalpto.com) but also from a custom domain like yourschoolspta.com.
This method changes your DNS NAME SERVERS. If you do not have a reason to use this method, we would suggest using our BEST METHOD LOCATED HERE.
Please Note: Domain names are registered with a third party provider of your choice and are not a part of Digital PTO. Once you have registered a domain name, we will teach you how to “point” it to us.
If you currently have custom email associated with your Domain Name, please click here for alternate instructions on how to assign only your website to Digital PTO and retain your custom email addresses. Note that Digital PTO does not provide emails for your custom domain, this is handled typically by your registar company.
Step 1: Purchasing a Domain Name

Please continue to read this before you purchase your domain name. Also, please remember that you do not need to add hosting, we provide that for you at no charge.
Step 2: Set your Name Servers
Step 3: Enter the Digital PTO DNS Server Names
Enter the following two NameServers:
ns1.digitalpto.com
ns2.digitalpto.com
Be sure to SAVE/UPDATE your settings.
If you are using custom email already with your domain, do not follow this step. See the instructions above for details.
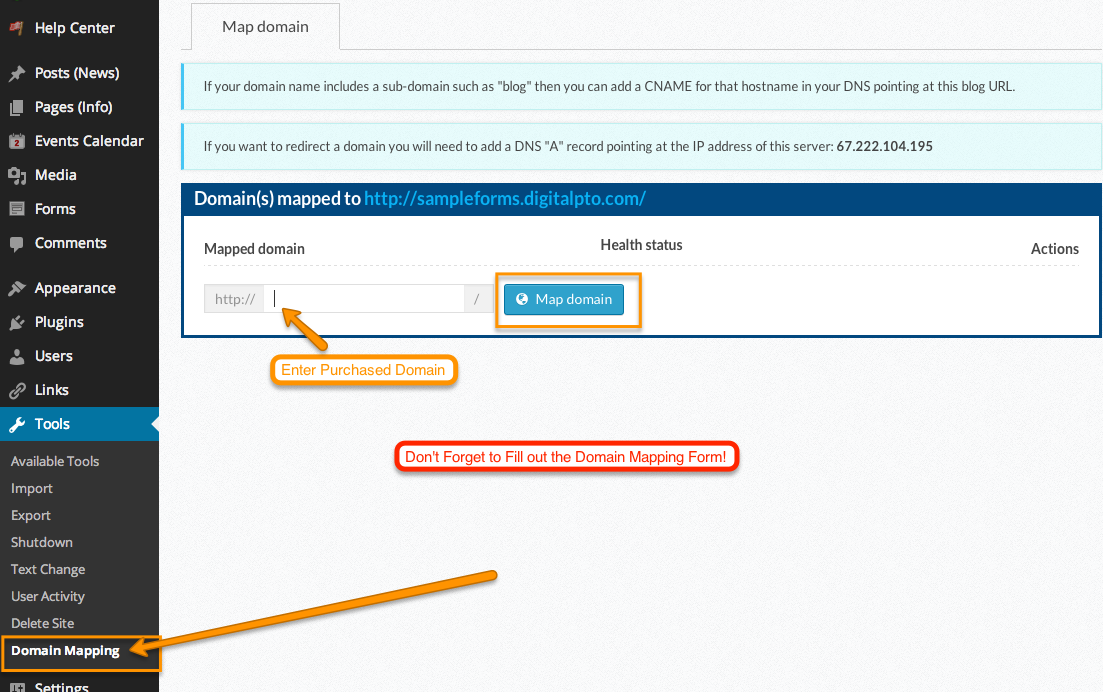
Step 4: Assign your Domain to your Site
Note: At this point your website might not load for a short period of time. Please be aware of this.
Step 5: Complete the Domain Assignment Form
FILL OUT THIS FORM to Complete your Domain Mapping on our end.
If you need to reactivate your site, you can delete the domain name you added under TOOLS > DOMAIN MAPPING and your site will be accessible.
