Almost every Digital PTO theme supports the menu editor allowing you to customize the navigation on any theme. The menus offer a ton of options but are also extremely easy to use. This tutorial will explain the specifics of the menu manager and how it works.
The Navigation Menu Bar

In most cases, your Menu bar it toward the top of your website, but that can vary based on the theme. The Menu bar typically displays the most important pages and links for a Parent Group and then nests Sub Pages (Drop Down Menu’s) under each of the primary pages. The menu above has the general pages listed in the menu and then you will see some sub pages under the Info section.
One note: if your menu runs into two lines, you have too many items on your menu bar. Consider reducing the number of main pages and add more sub pages, or consider renaming your menu items (explained below) so that they take up less space. Many of our themes do not support multiple rows of menu items.

To access the navigation menu options, head to the APPEARANCE MENU and then click on NAVIGATION MENUS. This will open up the main navigation options.
Understanding the Layout

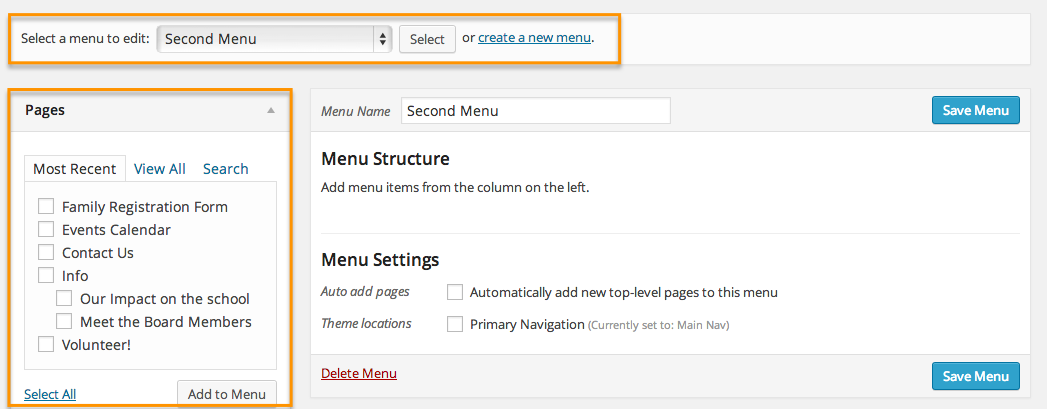
There are three main sections on the Navigation screen. Up top, you will see the menu editor tab (default) and the Manage locations Tab that is used if you have multiple menus, to the left you will see the different link options that can be added to your menu, and in the center you will see your current menu and it’s editable structure.
The Manage Locations Tab
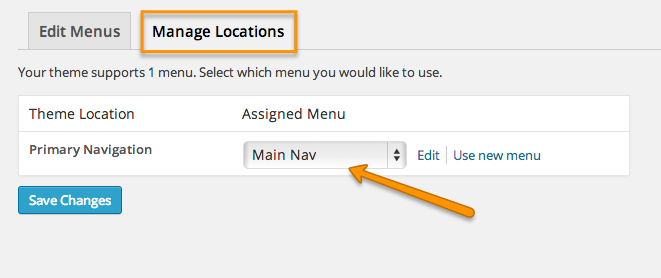
The MANAGE LOCATIONS tab is at the top of the page. This is where you will assign a menu to a location on your theme. Your theme (assuming that it supports custom menus) has at least one location built into the theme for custom navigation. Some thems have multiple locations. The Manage Locations sections allows you to tell your theme which menu you want assigned to each location. If you have changed a theme and your menus don’t look right, you probably need to assign the menu to the theme again. Check here first.
Right Side Content Overview

If you are on the Manage Locations tab, click back to the EDIT MENUS tab. The list of items along the right side of the Edit Menus page are all of the possible options you can add to your navigation menus. All themes will have PAGES, LINKS and CATEGORIES and depending on which theme and plugins you are using, you may have more options like Events Categories and more. To access any of the hidden options, click the down-arrow next to the section to expand it. When you are finished you can click the up-arrow to contract it again.
Pages
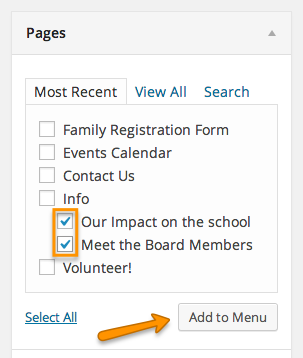
The Pages options are going to be the most common items you add to your menu. There are three tabs in the pages options, Most Recent, View All and Search. If you have a ton of pages, these are helpful options. In many cases using the Most Recent tab is all you’ll need. Scroll through your different pages to find the page you want to add to your menu. You can select multiple pages as well. Check the box next to the Page(s) you want to add and then click the ADD TO MENU button. This will add the pages you selected to the bottom of the menu. We’ll cover what to do with those a little further down.
Links

The Links Option is how you can add links to any page on any website. You can link to your school, your county website, etc. When you expand the LINKS section you will see two fields. URL & Link Text. Paste in the website address that you want to send visitors to in the URL field. Be sure to include the http:// portion of the link. Next enter the Link Text. This is the text that will be sown in the Navigation Menu, so if it was a link to your school for example, your link text might be “Our School”. When you’re ready, click ADD TO MENU and your new menu item will be waiting for you at the bottom of the current menu structure.
Categories
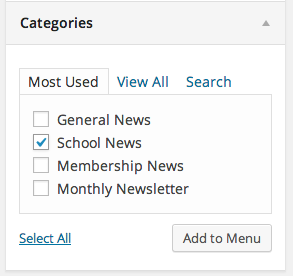
The Categories options function in a similar way that the Pages options function do. They also have three tabs (Most Used, View All & Search) and again, you’ll probably use Most Used more than any other option. The Categories options allow you to create links to specific news categories in your navigation menu. For example, if you have a specific volunteer category, you could create a menu item and link to all of the news assigned to that category. To add a category, check the box next to the categories you want and then click the ADD TO MENU button. This will add the categories to the bottom of your current menu structure.
Working with your Menu
Now we’re looking at the Menu Structure section. The Menu Structure options allow you to
- Change the Name of your Menu
- Adjust the Menu Layout and Order
- Specify Automatic Menu Options
- Specify Theme Locations
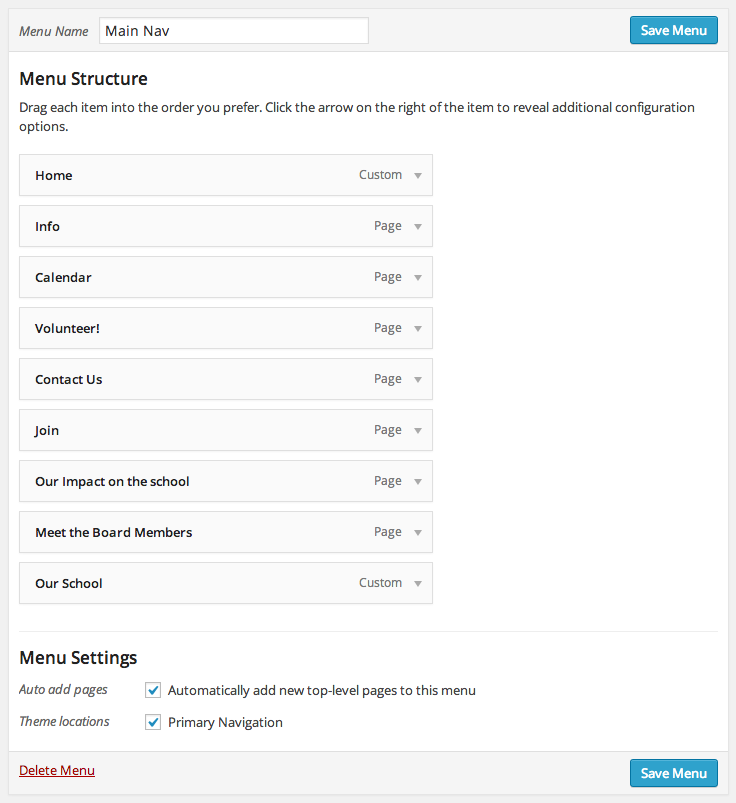
Menu Name

If you would like to change the name of your menu, you can do that with the Menu Name option. Reminder that changes do not take effect until you click the SAVE MENU button.
Menu Structure
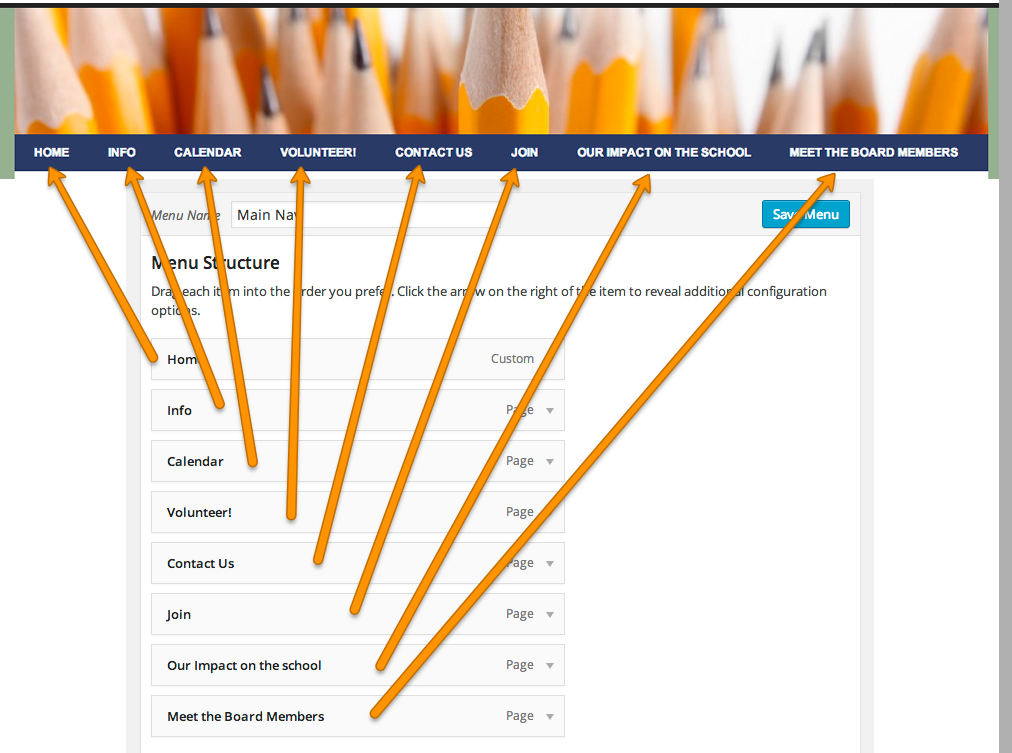
The Menu Structure is a visual editor based on the way your menu currently appears on the live site. If your menu is at the top of your site, the menu item at the top of the menu structure list is at the far LEFT side of your menu, and the item at the bottom of the menu structure list is the furthest RIGHT item in your navigation.
Moving Menu Items Around
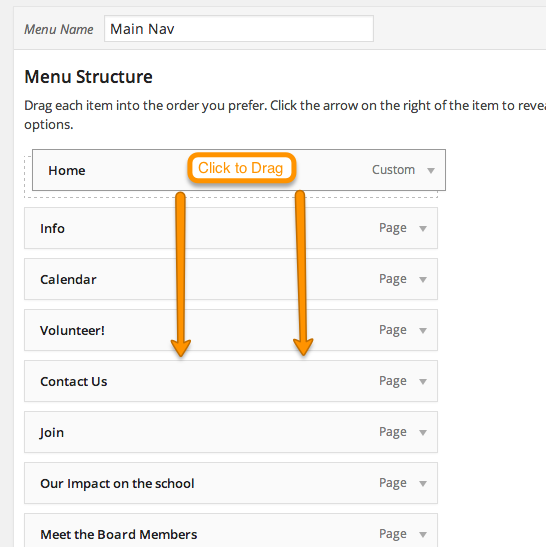
If you would like to change the order of your Menu Items, it’s very simple. Click and hold down on the menu item you want to move and then drag it up and down on the page to your desired location. Be sure to keep the menu in vertical allignment with the other menu items (i.e. not indented to the right) or you will create a sub menu (which we’ll cover next). Again, as a reminder, no changes are saved until you click the Save Menu button.
Creating Sub Menus (Drop Down Menus)

Creating a Sub Menu or Drop Down Menu is as simple as moving a menu item slightly to the right so that it appears indented in the Menu Structure. The indented item will become a sub-menu of the item above it. In the case of our example, Our Impact on the school and Meet the Board Members will be Sub Menus of the Info page. You can create Sub-Sub-Menus as well by continuing to indent. Most themes accept Parent, Child and Sub Child pages, but some accept more levels of indentation and some accept less.
Settings: Auto Add Pages

If the Auto Add Pages option is checked, this will automatically add any page that you create (if that page is not a child of another page) into your main navigation. This can be helpful if you are afraid of forgetting to add the link, but it can also get in the way because you may not want every top-level (Parent) page listed in the main navigation. It’s up to you.
Settings: Theme Locations

If your theme has more than one built in location for a navigation menu, they will all be listed here and you can select/deselect any location for the active menu you are editing.
To Delete a Menu
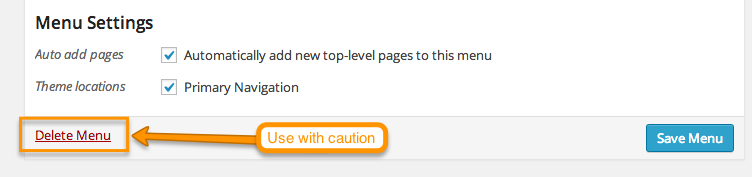
If you need to delete your menu for some reason or another, that can be done under the Menu Settings. There is NO UNDO for this function, so please use with caution.
To Create a New Menu
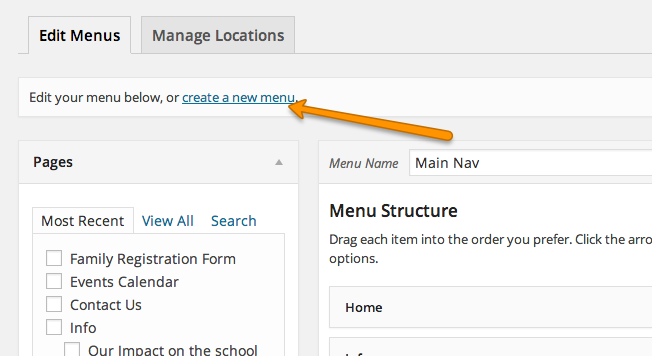
If you would like to create a new menu, you can do so by clicking the CREATE A NEW MENU link.
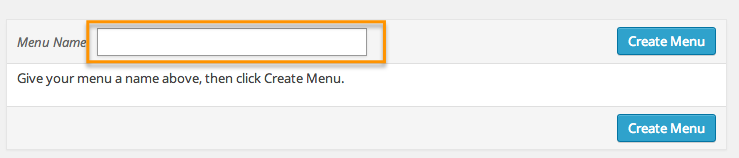
Then give your new Menu a name and click the CREATE MENU Button
Now you can create all of the links in your new menu, add an additional menu or switch to your first menu via the drop down menu.
Advanced Menu Options
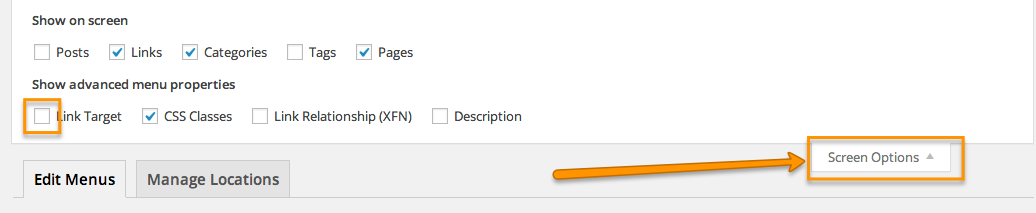
There are a number of additional adjustments you can make to further customize your navigation. First off, click the SCREEN OPTIONS tab in the upper right corner to drop down some options. In the Show Advanced Menu Properties section, ensure that both the LINK TARGET and CSS Classes options are checked. Now you can click SCREEN OPTIONS again to hide these options.
Accessing Advanced Options

To Access the advanced options for a menu item, click the down-arrow on the right side of the item and this will expand your options.
Navigation Label
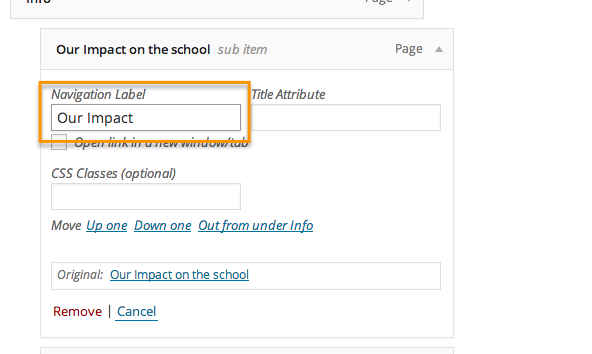
The Navigation Label is the text that will appear in your live menu. If you want to change the text of the menu you can do that here. In our example, we are going to shorten our menu text from “Our Impact on the School” to “Our Impact” – This will not change the actual page title, we want that to stay the same, but it will change the title of the link in the navigation that leads to that page.
Open Link in a New Window/Tab
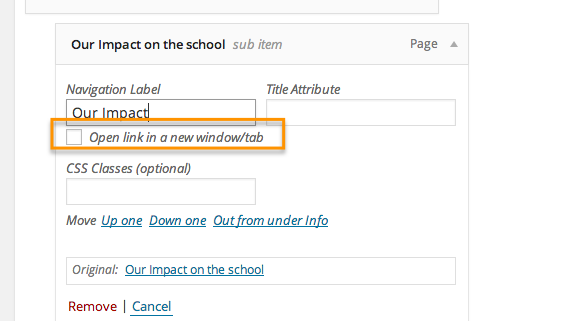
This option is great if you are sending your visitors to a different website. When you check this box and a user clicks on the link, it will open the link in a new window or tab for the user so that they can quickly return to your site simply by closing the new tab/window. Most commonly this is used when linking to a sign up form, a different website, etc.
CSS Class
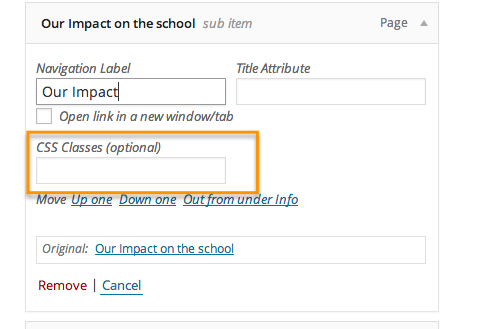
If you are familiar with CSS, we provide you the opportunity to create a new css class and then assign a menu item to that class. This would allow you to highlight particular pieces of your menu, etc.
Removing a Menu Item

If you would like to remove an item from your Menu Structure, click the red REMOVE link. You can also click the CANCEL link to discard any changes you’ve made.
A Reminder to Save

Don’t forget that none of your changes will take effect until you click the blue SAVE MENU button at either the top right or bottom right of the page. This is very important.
