How to create a News Post on your Digital PTO Website
First of all, it is important to understand the difference between NEWS Posts and INFORMATIONAL Pages. News posts are dated items that will get replaced eventually with newer news. Informational Pages are intended to always be available and are most likely found in the top menu of your website. This tutorial focuses on News Posts.
Please Note: You will need to be Logged In (how?) to make edits to your website
Step 1: Create a new New Post
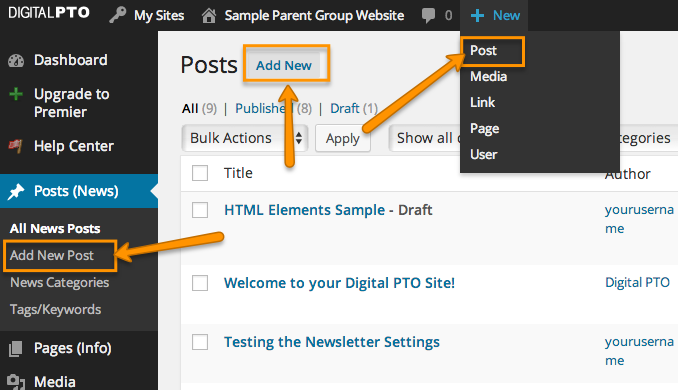
There are three ways to create a new News Post. You can hover over POSTS and then click on ADD NEW POST, you can hover over the + NEW link and then select POST or if you are on the News Posts list, you can click the ADD NEW link.
Step 2: Enter the Title of your News Post

In the first field, enter the TITLE of your News Post
Step 3: Enter the CONTENT of your News Post and Format
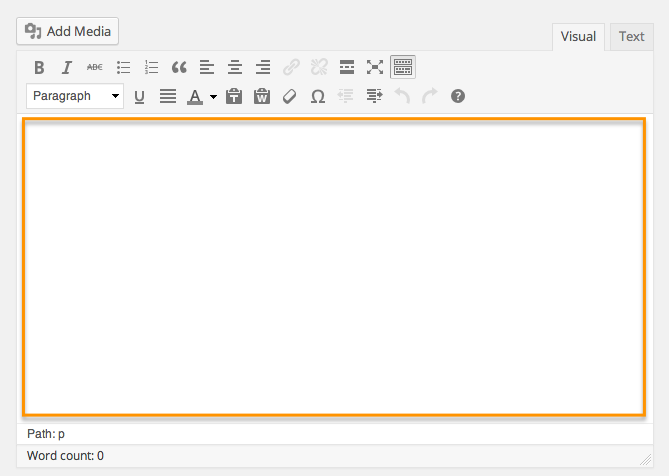
Type the News Story you wish to add in the main BODY field. You can edit your news just like your would with an email or word processing document. Bold, Bullets, Size, etc. If you do not see formatting options, please check to make sure the VISUAL (Not HTML) Tab is clicked in the top right corner of the Body area.
Step 4: Select or Create a Category
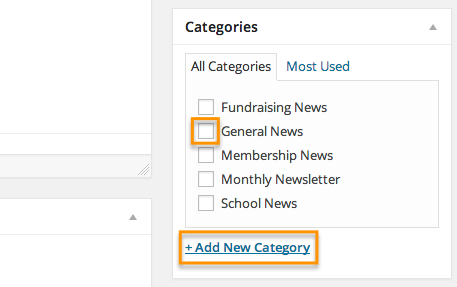
This is optional, but we highly suggest you use categories with your News Posts. This makes it much easier for your visitors to find the exact information they are looking for. To assign a category, check the box next to the category you wish to select. If you want to add a new category, click ADD NEW CATEGORY, enter the Category Name and Select either Parent (suggested) or make the New Category a SUB CATEGORY and select a Parent category (more complicated, works great).
Step 5: Preview and Publish your Post
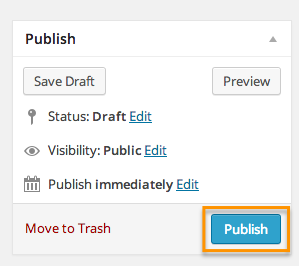
If you are not ready to publish your News Post, click SAVE DRAFT and it will be saved for later. To see a live preview of the News Post you are working on, click PREVIEW. This will open a Preview for you in a new window to review. If you need to change the publication date of a post (to the past or future) click EDIT next to Publish Immediately.
And as soon as you are ready to post your News Post, click PUBLISH and you’re done! Congrats.
Remember: if you do not SAVE and/or PUBLISH your changes, they will not be saved.
