Embed Any Document Settings
The Embed Any Document Plugin is preinstalled on all Basic, Premium and Premium Plus Websites. This plugin allows you to display a PDF document (newsletters etc) directly on your website. It is extremely simple to use.
Please Note: You must convert your documents to a PDF before they can be used with this Plugin.
ACTIVATE the Embed Any Document Plugin
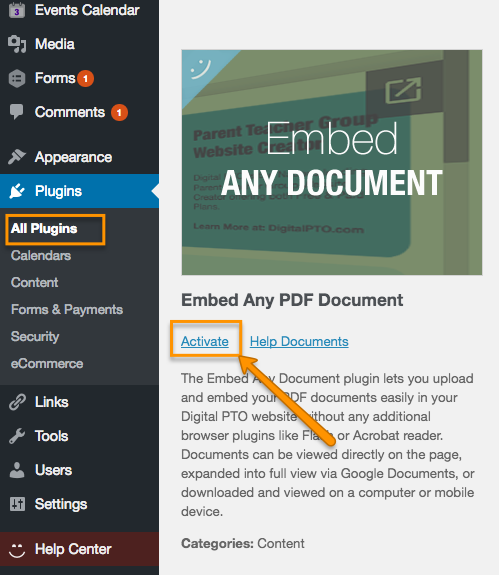
Navigate to PLUGINS > ALL PLUGINS and then find the Embed Any PDF Document Plugin. Click the ACTIVATE link and when the page refreshes, you’re all set.
Step 1: Click the ADD DOCUMENT Button on an Info Page

When you are in a new Info Page that you would like to add a document to, simply click the ADD DOCUMENT button to get started.
Step 2: Select UPLOAD or URL Option
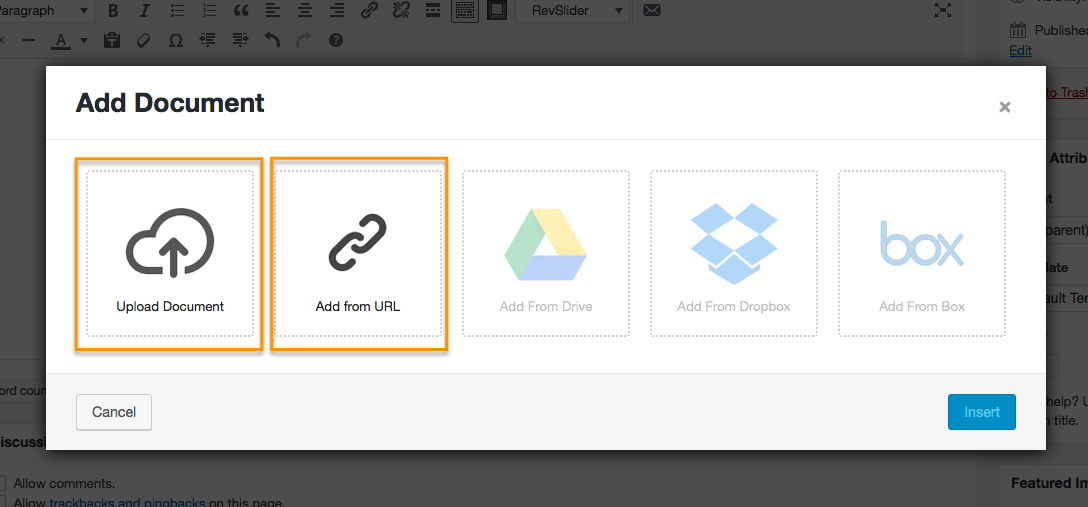
If you need to upload your document, select the UPLOAD DOCUMENT option on this screen. If you have already uploaded your document, you can also click the UPLOAD DOCUMENT option and select your file from the existing Media Library. If you want to embed a document from an outside source, you can select the ADD FROM URL OPTION.
Step 3: SELECT FILE TO UPLOAD
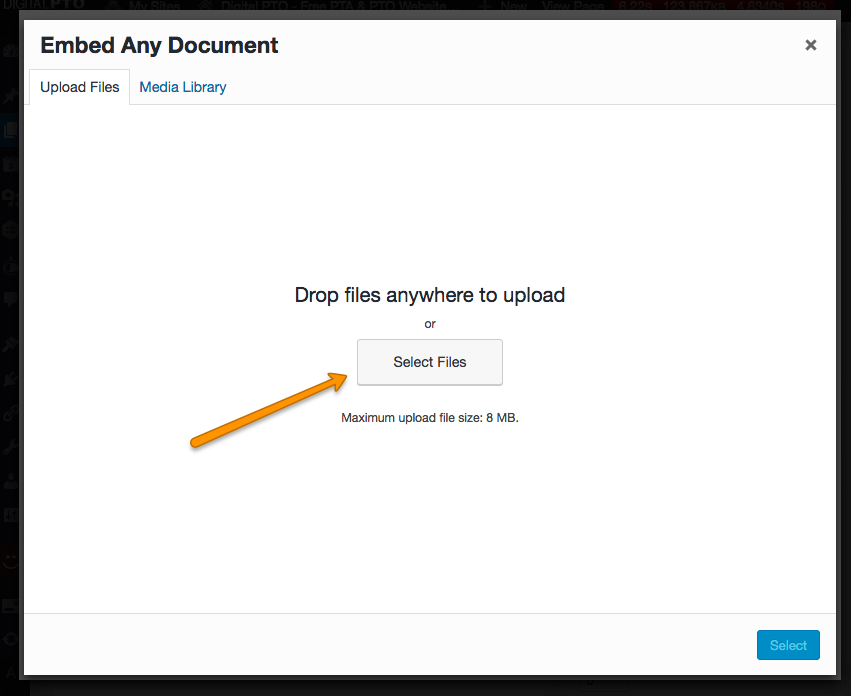
To Upload a new file, click the SELECT FILES button and find the file you wish to upload on your computers hard drive.
Step 4: To Use an Existing Document

If the document you want to embed on your page is already uploaded to your website, click the MEDIA LIBRARY tab and then you can click the PDF file you wish to embed and then click the SELECT button.
Step 5: Review Embed Options
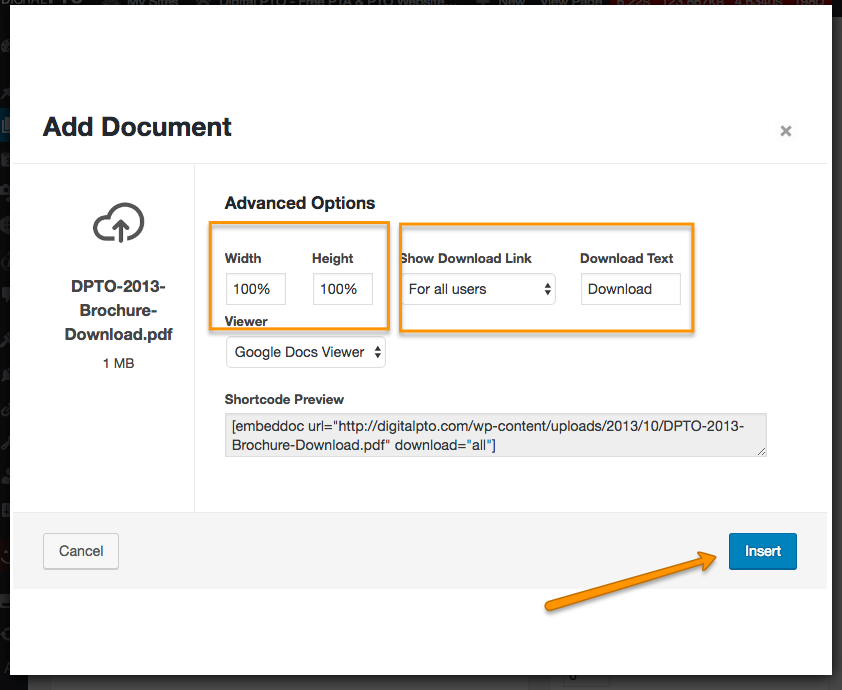
After you click the SELECT button you will be presented with some advanced options. We suggest keeping the options as they are set by default unless you have a reason to change them. You can alter both the size of the document and the ability to download the document. We do not recommend switching the Viewer option away from Google Docs Viewer. When you are ready, click the INSERT BUTTON.
Step 6: Update your Page

After you click the INSERT button, you will be returned to your Page and a new code will have been added to your content. This is called a “Short Code” and it is the code that will display the document you just added. When you are ready, click the UPDATE button to save your changes.
Step 7: Review the Live Page

Once your changes have been saved, be sure to view your live page to make sure everything looks like you expected!
