Email Notifications: Users

How to Set up your User Email Notifications on Forms

Digital PTO offers a wide variety of Pre-Built Forms for our Premium Members. When we install forms on your website, they come ready to go, but you may want to customize certain elements of your form. One of the great areas to customize is your email notifications. These settings will allow you to change where the form submissions are sent, what they say and who gets them.

This tutorial will show you how to set up your user notification emails, which are the emails that your users will receive after they submit a form. Often times this is a confirmation of receipt, or even a sales receipt. It can vary based on your needs.

Note: If you are collecting credit card payments directly on your forms you need to refer to the Wufoo Directions for this information.

Click FORMS under the FORMS Menu

click-forms

To open up the list of forms available on your website, click the FORMS link under the FORMS Menu.

Click the Title of the Form you wish to set up

click-title

Click on the title of the form you wish to set up. When you hover over the title, you can also click EDIT if you prefer. This will open up the form editor.

Click to access Email Notifications

click-nitifications

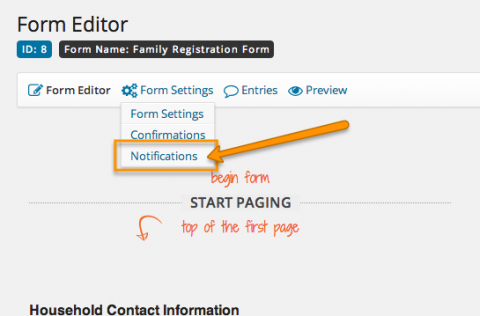
Hover over the FORM SETTINGS link at the top of your form and select NOTIFICATIONS to set up the email address you want your submitted forms sent to. By default, confirmations will be sent to the email address that was used to sign up for your website, so be sure to change this if you want them sent somewhere else.

Click EDIT under the Admin Notification Settings

click-user

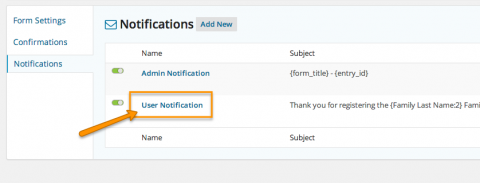
Once the Notifications section comes up you will see either nothing set up yet, an Admin Notification or Both an Admin and User Notification. If you have nothing, click ADD NEW and create a User Notification. If you have a User Notification set up, click the EDIT link when you hover over the title. Please note that the wording of the title may be different depending on the title you may have previously assigned. The goal is to edit the notifications for the User, so find the title closest to that. 

The Options Screen

optionsscreen

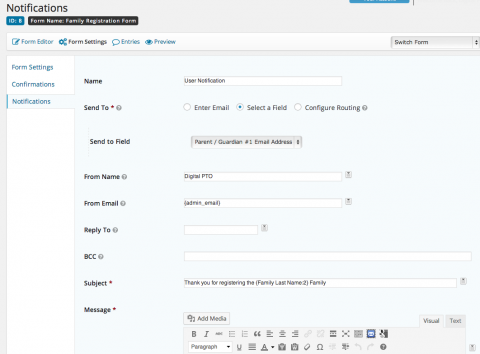
 The options screen provides you with a lot of customization options. If you want the simplest settings, you can skip any setting listed as “optional” as those are fine tuning settings.

Name

name

You can enter or edit the name for the notification you are working on. This is for internal use.  

Send To:

send-to

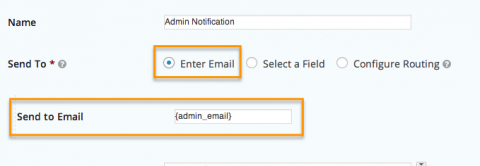
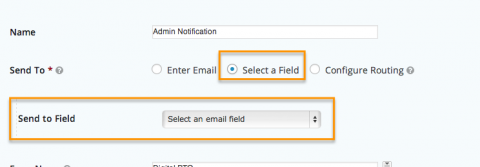
Determine where you want to send the admin notification email. Most common selection is ENTER EMAIL, but you can also select SELECT A FIELD or CONFIGURE ROUTING.

Send To: Enter Email

sentto-email

This setting is not typically used for user notifications as this is a fixed email address. This is most commonly used for Admin Notifications.

Send To: Select a Field

sendto-selectifeld

This option is most common for user notifications. Click the SELECT A FIELD option and then select the email address you want to use from the submitted form.

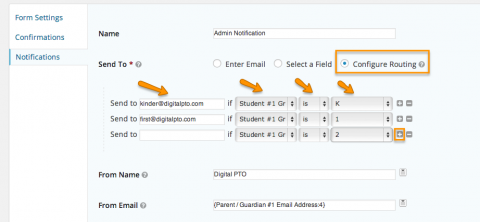
Send To: Configure Routing

sendto-routing

Not commonly used on User Notifications. This advanced option allows you to send an email notification to someone based on the users submission. For example, you can set up the first graders registration forms to go to a different address than the second grade forms.

To set this up, click CONFIGURE ROUTING in the Send To options. This will open up new fields. Send to (blank) where the blank is the email address you want to send a message to. IF and then select one of the options on your website. Then select IS, ISN’T, etc and a value. If you need to add more rows (rules) click the PLUS sign. The Minus sign will delete un-needed rows as well.

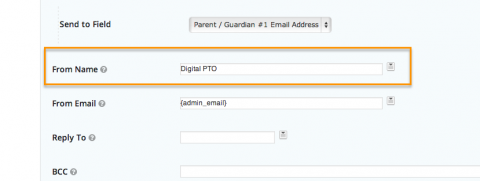
From Name

from

Enter the name you want the email sent from. Most commonly this is your Groups Name.  

From Email

userfromemail

IMPORTANT: The FROM EMAIL is the address that the email is sent from when you receive it. You MUST change this email address to “[email protected]” or there is a very good chance that your emails will not be delivered as the major email providers have started to match the sending server and the email address together and won’t accept mis-matches in most cases. You can still change where the reply is sent (see below), but it’s very important that the FROM address is [email protected]

Reply To

replyto

We suggest using the email address for your parent group in this field so that if a user replies to their email notification it will be sent directly to your email box.

BCC

bcc

Optional Field: If you would like form submissions sent to more than one address, you can enter an additional email addreses to send the form to here.  

Subject Line

subject

You can change the subject line of the email the user receives if you wish. If you want to add a custom field, you can select one from the down arrow to the right of the field.  

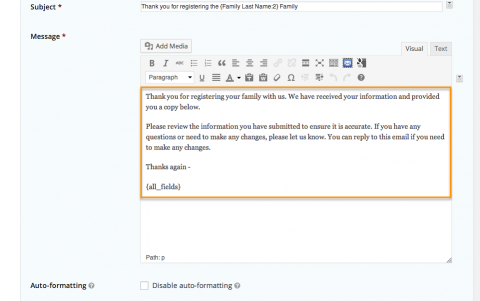
Notification Message

message

By Default, the notification email will include all the fields that were submitted. If you would like to change that, you can do so in the MESSAGE field. Remember, this is the message that is sent to the Admin, not to the Visitor who filled out the form. If you would like to add dynamic fields (like we did with the email address above), click the arrow to the right of the message and insert any dynamic fields by clicking on them. We suggest keeping the settings to {all_fields} as a general rule, but it’s up to you. 

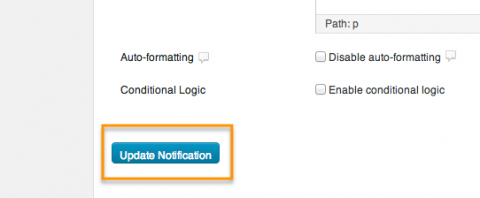
UPDATE NOTIFICATION

adminupdatebutton

When you have finished making any additional changes to your Admin Notifications, be sure to click UPDATE NOTIFICATION to save your changes. Once the page reloads, you can click on NOTIFICATIONS again if you wish to review additional notifications.